
MapBox is a location data platform for mobile and web applications. They provide building blocks to add location features like maps, search, and navigation into any app you create. For this app we're going to use their iOS SDK in order to show basic point annotations on their Map.
Installing the Mapbox SDK
First we're going to be adding the Mapbox SDK to our project. The best way to add the SDK to the app is through CocoaPods.
If you don't already have CocoaPods installed on your machine then open up a terminal and run the following command.
sudo gem install cocoapods
Open up a terminal and navigate to your project directory. You want to be in the folder that holds your <project_name>.xcodeproj. Then run the following command to initialize Cocoapods with your project.
pod init
Once complete there should be a new file created inside the directory called Podfile. This is the file we'll edit to add the Mapbox SDK Cocoapod to our app. Open that file up and add the following line underneath the comment # Pods for <project_name>. Remember to save your file after making your edits.
pod 'Mapbox-iOS-SDK', '~> 5.9'
Now head back to your terminal and run the following command to install the Pod. This may take a few minutes to download and install the SDK to your project.
pod install
Once finished close your Xcode project and reopen it. Instead of opening the <project_name>.xcodeproj, open up the <project_name>.xcworkspace file. This is the file we'll be using from now on to edit our project. It does all of the work of including the Mapbox SDK in our project.
Setup API Token and Permissions
In order to use the Mapbox SDK in your app you'll need an api token. Fortunately this is free.
- Create an account on Mapbox.com
- Navigate to your account home
- Scroll to bottom where it says "Access Tokens". It will show you your default public token which you can use for this app.
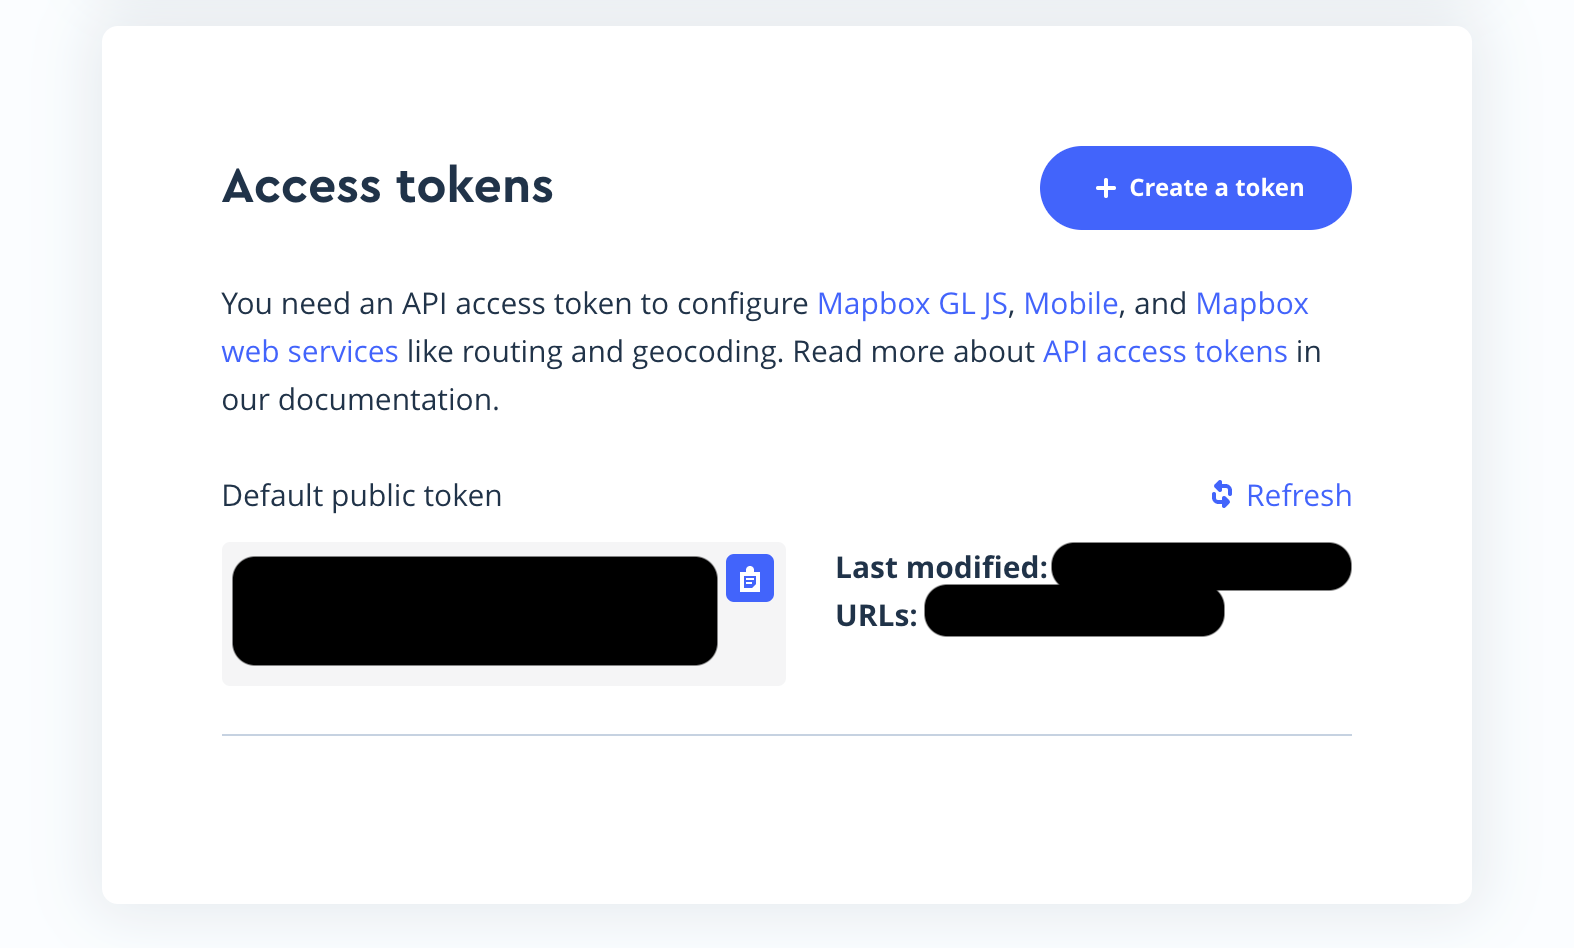
- Next we nee to copy the token to your
Info.plistfile. Create a row with the keyMGLMapboxAccessToken, and the value should be your access token. - Create another row in your
Info.plistfile with the keyNSLocationWhenInUseUsageDescriptionand the valueShow user location on map.
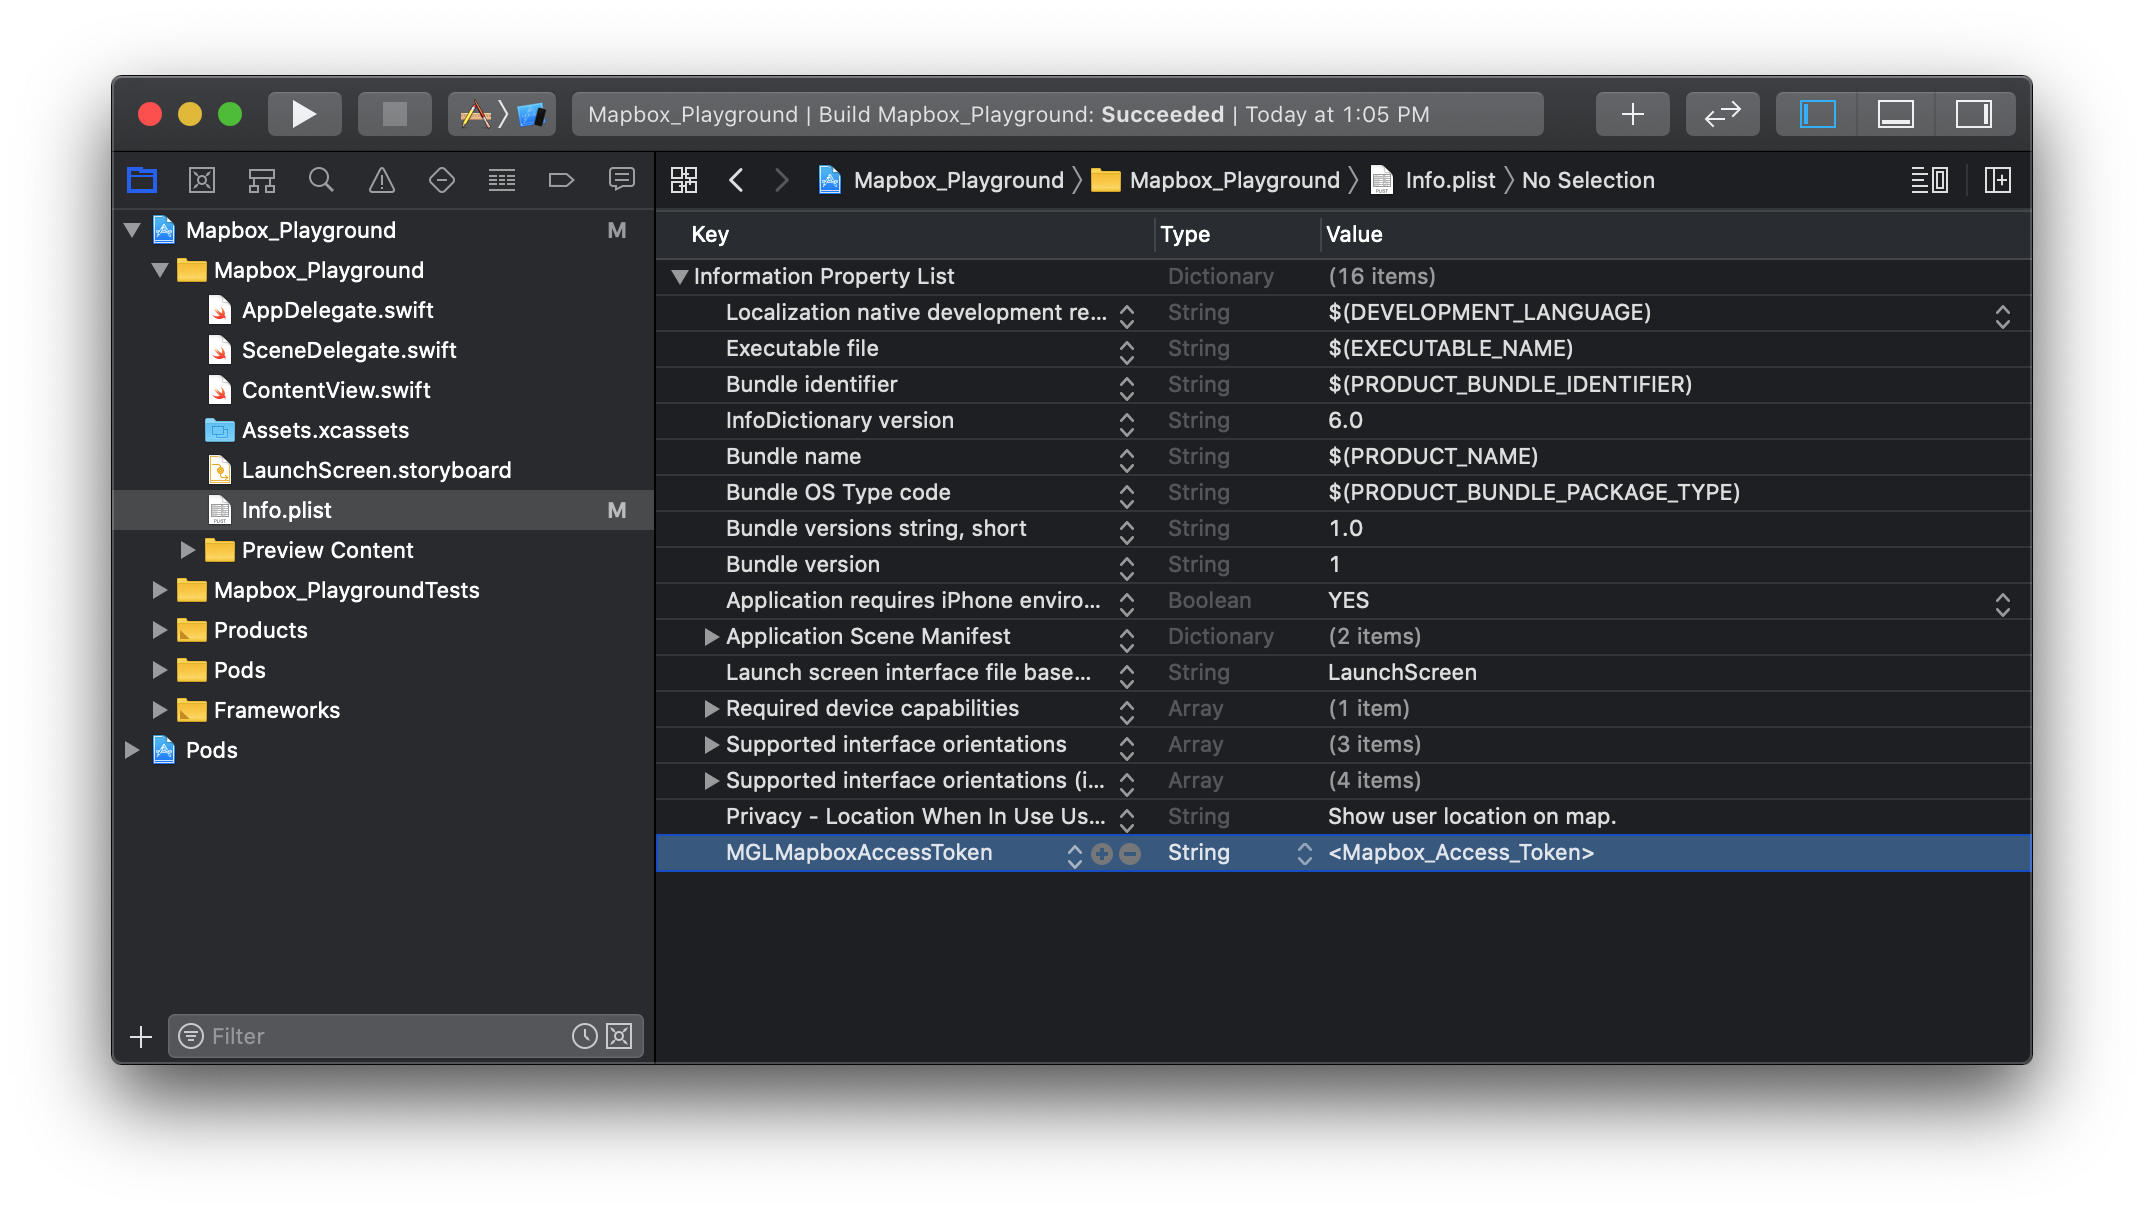
Info.plist to include access token and usage descriptionAdding a Map
In order for us to to use Mapbox's MGLMapView in our app, we'll need to create a UIViewRepresentable (Apple's Documentation).
MapboxMap
import SwiftUI
import Mapbox

struct MapboxMap: UIViewRepresentable {

    private let mapView: MGLMapView = MGLMapView(frame: .zero, styleURL: MGLStyle.lightStyleURL)

    func makeUIView(context: Context) -> MGLMapView {
        mapView.autoresizingMask = [.flexibleWidth, .flexibleHeight]
        mapView.setCenter(CLLocationCoordinate2D(latitude: 59.31, longitude: 18.06), zoomLevel: 9, animated: false)
        mapView.delegate = context.coordinator
        return mapView
    }

    func updateUIView(_ uiView: MGLMapView, context: Context) {}
}
Then navigate to your ContentView.swift file and replace the Text placeholder with a MapboxMap like this:
struct ContentView: View {
    var body: some View {
        MapboxMap()
    }
}
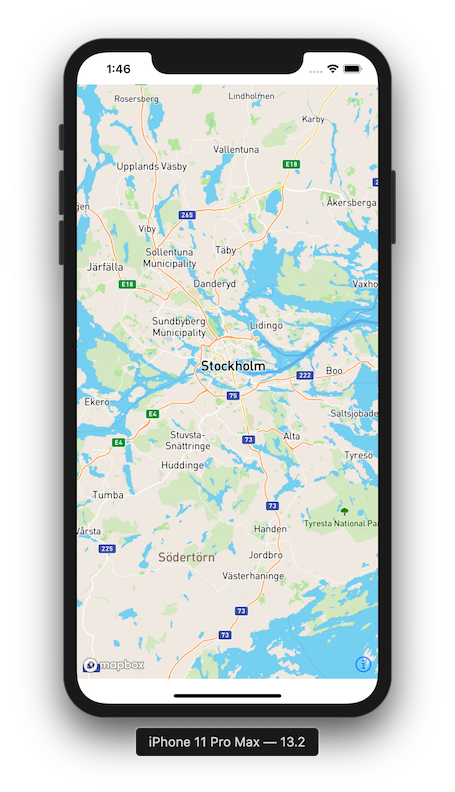
MapboxMapAdding Annotations
Let's continue with the development of our MapboxMap struct. We're going to add a coordinator to allow us to interface with the MGLMapVieDelegate. This will allow us to do things such as plot annotations on the map.
Create a Coordinator
Inside your MapboxMap struct define the class Coordinator which inherits from NSObject and implements the MGLMapViewDelegate.
class Coordinator: NSObject, MGLMapViewDelegate {

}
Next we need to implement the MGLMapViewDelegate functions which allow us to add annotations.
class Coordinator: NSObject, MGLMapViewDelegate {

    func mapView(_ mapView: MGLMapView, viewFor annotation: MGLAnnotation) -> MGLAnnotationView? {
        return nil
    }

    func mapView(_ mapView: MGLMapView, annotationCanShowCallout annotation: MGLAnnotation) -> Bool {
        return true
    }

}
Implement makeCoordinator
Inside your MapboxMap struct we need to implement the makeCoordinator() function and tell it to use our new coordinator. SwiftUI calls this makeCoordinator() method before makeUIView(context:), so that you have access to the coordinator object when configuring your view.
You can use this coordinator to implement common Cocoa patterns, such as delegates, data sources, and responding to user events via target-action.
func makeCoordinator() -> MapboxMap.Coordinator {
    return Coordinator()
}
Then update the makeUIView(context:) function to set our the mapView delegate as the coordinator.
func makeUIView(context: Context) -> MGLMapView {
    mapView.autoresizingMask = [.flexibleWidth, .flexibleHeight]
    mapView.setCenter(CLLocationCoordinate2D(latitude: 59.31, longitude: 18.06), zoomLevel: 9, animated: false)
    mapView.delegate = context.coordinator
    return mapView
}
Storing Coordinates for Annotations
At the top of your MapboxMap struct we need to create a variable to hold the coordinates for our annotations.
@Binding var locations:[CLLocationCoordinate2D]
Now let's create a function to add these coordinates as annotations to our map. The function below takes to the current annotations on the map and builds a new array of Point Annotations to be placed in accordance with the locations currently stored in our locations variable.
private func updateAnnotations() {
    if let currentAnnotations = mapView.annotations {
        mapView.removeAnnotations(currentAnnotations)
    }
    mapView.addAnnotations(locations.map({ (coord) -> MGLPointAnnotation in
        let annotation = MGLPointAnnotation()
        annotation.coordinate = coord
        return annotation
    }))
}
Now all we need to do is call is in our updateUIView(uiview:,context:) function.
func updateUIView(_ uiView: MGLMapView, context: Context) {
    updateAnnotations()
}
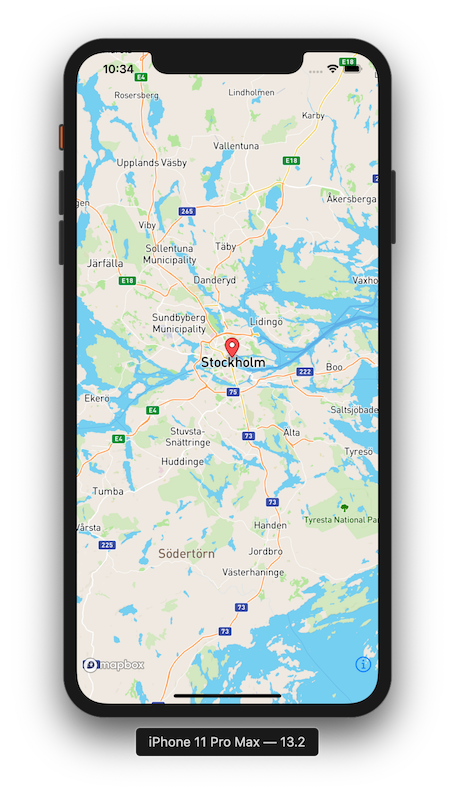
Running an Example
Head back to ContentView.swift and try running with the following code.
struct ContentView: View {

    @State var locations:[CLLocationCoordinate2D] = [CLLocationCoordinate2D(latitude: 59.3293, longitude: 18.0686)]

    var body: some View {
        MapboxMap(locations: $locations)
            .edgesIgnoringSafeArea(.vertical)
    }
}
Support Future Tutorials!
Please consider subscribing using this link. If you aren't reading this on TrailingClosure.com, please come check us out sometime!
If you've built something using this tutorial, send us pics! Find us on Twitter @TrailingClosure, or email us at [email protected]